As a displaced New Yorker, one of my unsatisfied cravings, besides pizza, is Italian ices. They just don't exist out here in Colorado. My college summers, spent working at a day camp on Long Island, were amazing and full of insane amounts of Italian ices. When we grew tired of night swimming or having impromptu dance parties, we would all borrow my parents' mini-van, pack in as many bodies as possible and drive to Ralph's Italian Ices. For those of you who are unfamiliar, Italian ices don't simply come in lemon or cherry. Ralph's had more flavors than an ice cream shop: snickers, almond joy, jelly ring, toasted coconut. It was so good!
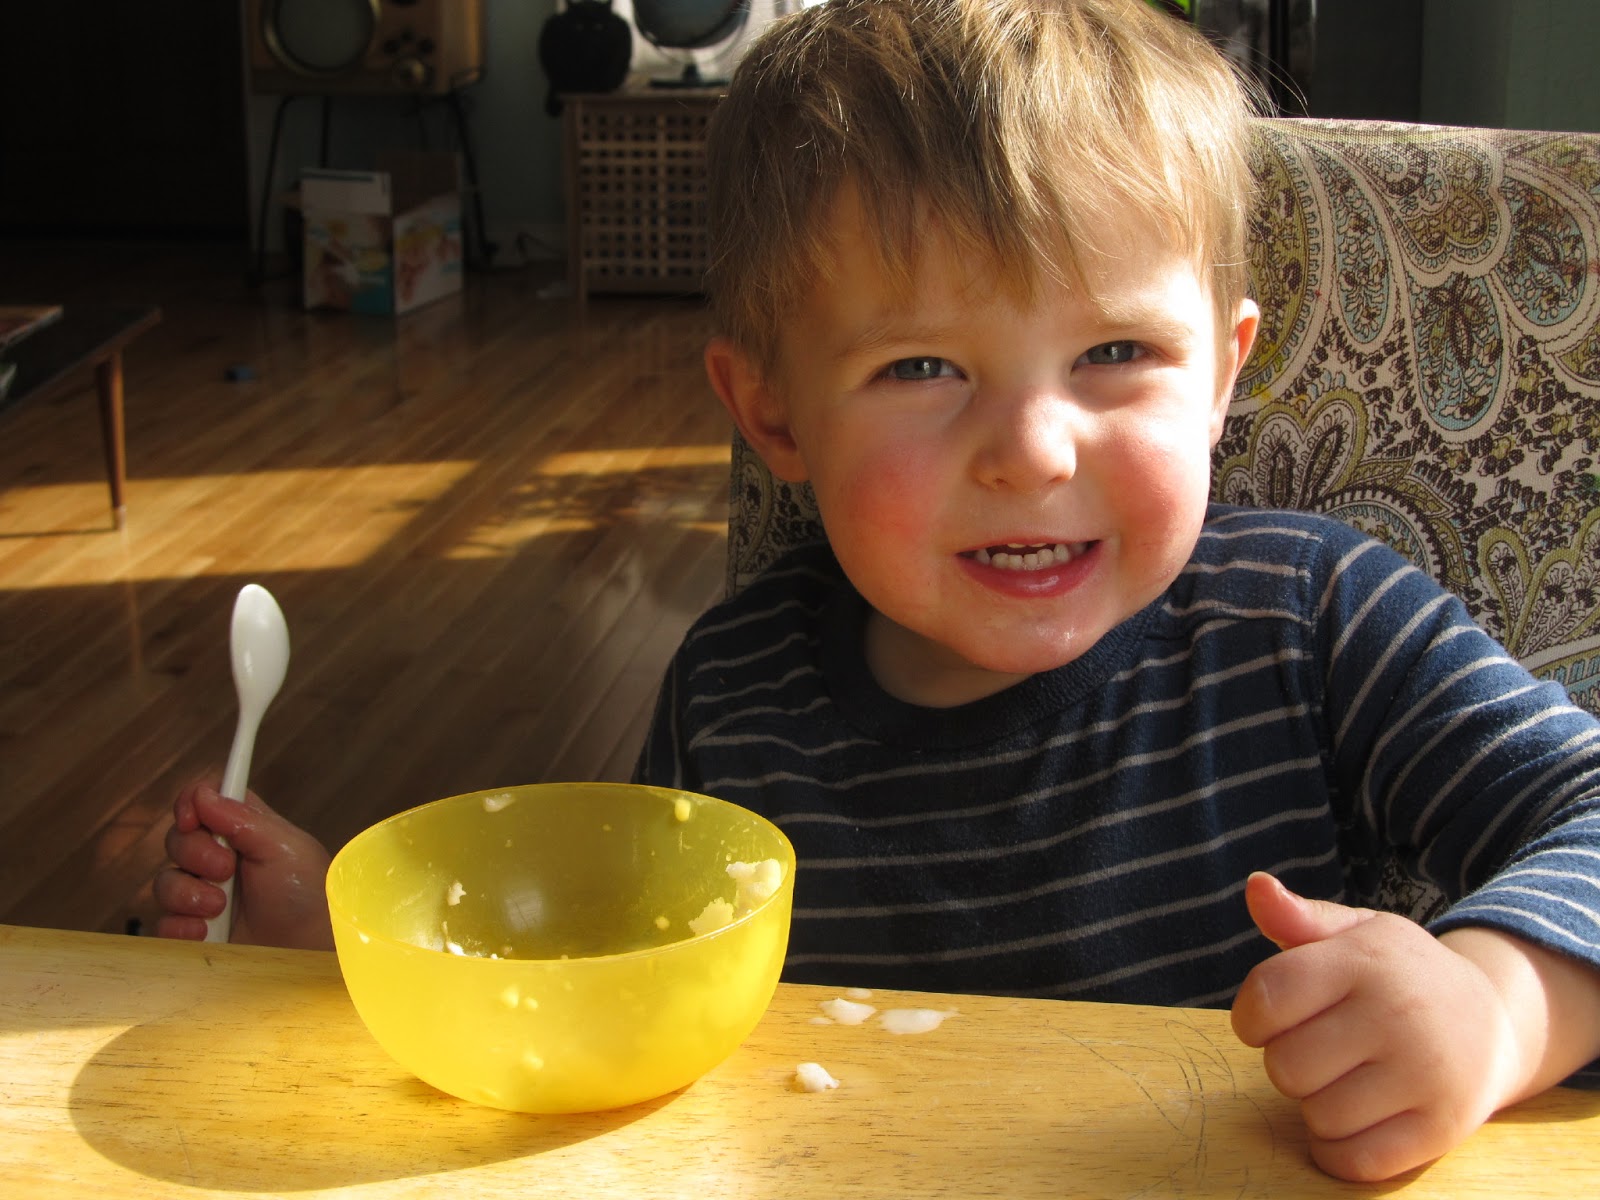
Yesterday, while frolicking in the snow with Emmett, I wanted a sweet treat. I vaguely remembered my mom letting us gather snow and pour juice over it. Then I thought, "Maybe a little milk, sugar and vanilla would work instead of juice?" I left the boy outside to play with the snow mountain that we made for his cars, and gathered my supplies. I filled a bowl with clean, non-yellow snow, whisked together my other ingredients, poured them on top of the snow, mixed it all together, took a taste and was whisked back to Long Island. The vanilla snow ice cream had the same texture and flavor as my beloved, long-lost Italian cream ices. If you decide to try this recipes, the world is your oyster. Try tossing in some mini-chocolate chips or blending some raspberries or strawberries into your milk mixture! I currently have a batch chilling and solidifying slightly in the freezer. Can't wait to save it for my "child is napping" treat!
"Snowmade" Vanilla Ice Cream
*Yields about 6 cups of ice cream
1 1/2 cups of whole milk [if you don't have whole milk, feel free to play around with a mixture of milks: equal parts half and half and nonfat milk or nonfat milk with a couple tablespoons of heavy cream added in]
2 t good vanilla extract
3 T sugar
8 cups-ish of snow
Whisk together the milk, vanilla and sugar. Let stand for a minute or two while you gather your snow.
Fill a mixing bowl with approximately 8 cups of snow. Pour the milk mixture over your snow, feel free to let little ones help with the whole process. This boy could hardly wait!
After the mixture has been poured, it will look like this:
Mix the snow and milk mixture until the milk mixture is fully incorporated into the snow. The snow will melt slightly during this process.
Dish up immediately or scoop some into tupperware and freeze for later.
I took the little one on a trip to the library last week. As soon as I stepped foot inside, I swear that the lights dimmed, "Let's Get It On" came on and a shimmery spotlight shined down upon the new Smitten Kitchen cookbook. Of course, I threw my two year old to the side and ran to get it into my little paws.
I have been having luxurious moments sipping coffee while staring at her photos, pretending not to hear the little one sneaking playing with his trucks while he is supposed to be napping. She has a recipe for chocolate chip brioche soft pretzels in her cookbook that looks unbelievable and has had me craving soft pretzels since I read the recipe.
Of course, we also decided to watch calories a week or so before I picked up her book. I keep getting inspired by her and wanting nothing more than to spend my days baking and frolicking in the kitchen, but alas.
This weekend was a different story, it was our cheat day and it was chilly and slightly snowy outside. As soon as the little one went down for his nap, an urge to knead dough and have fresh baked goodness took over.
I started to make a generic bread dough and then thought, "What if I finally tried to make soft pretzels, the kind that you boil first?" Well, they were awesome and all that you could over hope for on a snowy afternoon!
The trick was in the boiling method. I checked with Alton Brown first and am so glad that I did. He added baking soda into his boiling water. The boiling before baking creates the signature doughiness of a soft pretzel and the baking soda changes the water's acidity to alkaline which encourages the chemical reaction that beautifully browns the outside of the soft pretzel. I really think that this boiling method covers over a multitude of dough issues too. I basically made a pizza dough and used it, but you could use any dough you want and trust that the boiling before baking method will yield a doughy and delicious soft pretzel.
Homemade Soft Pretzels
1 1/2 cups of 115 to 120 degree water
1 t sugar
1 1/2 t active dry yeast
1 t kosher salt
2 T olive oil
3 1/2 cups of all purpose flour
For Boiling
10 cups of water
2/3 cup of baking soda
Topping
1 T water
1 egg yolk
2 tsp coarse sea salt
Lightly stir the sugar and yeast into the warm water to combine. Let sit for about five minutes so that the yeast can start to work. You will see slight foaming after the five minutes. This means that the yeast is working!
Pour the yeast mixture into a large mixing bowl. Add to this mixture, the salt, oil and flour. Stir the mixture with a wooden spoon to until it just starts to come together and then remove your rings to start kneading.
Remove the dough from the mixing bowl and knead for about five minutes until the dough is so elastic that when you push your thumb into the dough, the thumbprint immediately pops back out.
At this point, roll your dough into a ball and place it back into the mixing bowl. Cover with plastic wrap and let rise for at least two hours in a warm place. My little tip, especially on cold days in the middle of winter, is to turn the oven on low [about 200 degrees] and let the dough rise in its bowl on top of one of the burners.
After two hours, the dough should have doubled in size.
Remove the dough from the bowl and divide it into eighths. Roll or squeeze each dough piece into a long rope, about 18 inches in length.
Twist each dough length into a pretzel shape. I did this by forming the dough into a "U" shape, then twisting both ends of the "U" together a couple of times before bringing the twisted ends down and pressing them into the bottom of the "U" shape.
Preheat the oven to 450 degrees. Bring the water and baking soda to a boil in a large soup pot. Meanwhile, line a large baking sheet with either a silpat or parchment paper. Boil each pretzel for 30 seconds. The pretzels will drop to the bottom of the pot and then float towards the top of the water towards the end of the 30 seconds. Once each pretzel has boiled, retrieve it from the water with a spatula and place it on the silpat or parchment paper.
Beat together the egg yolk and tablespoon of water. Brush the top of each pretzel with the egg yolk mixture and sprinkle the coarse salt on top.
Bake at 450 for about 15 minutes or until the pretzels are nicely browned.
Eat the pretzels as is or with mustard or, even better, with some cheese sauce!
The other night, we had some of our besties over for dinner. I wanted something special, delicious and winter-hearty; something that made the whole house smell amazing and made you salivate as soon as you opened the front door.
I turned to my beloved enchiladas. For years, enchiladas have been one of my go-to pantry busters. I use any tortillas that I have on hand and saute whatever latin-style ingredients I have in the fridge and pantry. I have done them with a leftover chicken breast. I have done them with a simple can of beans, sauteed onion and cilantro. Basically, as long as you roll them up, coat in some sauce and bake them with cheese on top, you can't lose!
I had always used either store bought enchilada sauce or, in a pinch, replaced the sauce with salsa. It wasn't until my husband decided to try his hand at making his own hot sauce, that I discovered how easy and tasty it is to make your own enchilada sauce.
When Sam was going through his hot sauce experimentation phase, we went to our local Mexican grocery store and bought a couple large bags of dried chilis. We only used about half of each bag and had the rest sitting, untouched, in our pantry for quite a few months. One day I grew sick of looking at them and thought that I would reconstitute them in some boiling water and then puree them up to make a sauce. The result was a good but really basic red chili sauce. I have since "sassed" the sauce up a bit by reconstituting in chicken stock and adding garlic, cumin, salt and pepper to the liquid. The result is so good!
Rotisserie Chicken Enchiladas with Homemade Enchilada Sauce
*Serves 6 people with 2 enchiladas per person
For the Sauce:
12 dried Guajillo peppers [don't worry, these peppers have great chili flavor and next to no heat...for more heat try something like dried Ancho chilis]
4 cups low sodium chicken broth
2 cloves of garlic
2 t ground cumin
1/4 t black pepper
For the Enchiladas
Meat from 1 rotisserie chicken, shredded
1 red bell pepper [use any color you like], chopped
1 onion, chopped
2 T olive oil plus a couple more for greasing the pans
1 tsp ground cumin
1 tsp paprika
1/2 tsp each of salt and pepper
Juice of half a lime
12 large flour tortillas
8 oz. shredded sharp cheddar cheese
Optional Toppings
Lime juice
Chopped Cilantro
Sour Cream
Begin by placing all of the sauce ingredients into a saucepan. Simmer for 30 to 40 minutes over medium low heat until the peppers have begun to plump up.
Once the chilis have plumped, remove the stems from the chilies. They should pull out effortlessly. Place the de-stemmed chilies and the remaining contents of the pan into a blender and blend on high for about a minute.
Pre-heat the oven to 375 degrees.
Heat the oil over medium heat in a large frying pan. Add the onion, red pepper, cumin, paprika, salt and pepper to the oil and saute for about 5 minutes until the onions are translucent. Stir the shredded chicken into the mix and saute for a couple of minutes to heat up the chicken. Remove the mixture from the heat and pour the lime juice over it, stirring to combine.
Prepare your baking pans for "enchilada time" by placing a tablespoon of oil and a few tablespoons of enchilada sauce into the bottom of your pan. Shake the pan a bit to thoroughly cover the bottom. I used a 9 x 13 and an 8x8 but feel free to use whatever combo of rectangular or square pans you like.
Begin assembling the enchiladas by placing a couple heaping tablespoons of the chicken mixture in a horizontal line across the middle of your tortilla. Fold both the right and left side of the tortilla slightly over the chicken mixture and, holding those sides down, roll the top of your tortilla all the way down, making a burrito-shape.
Place the tortillas, seam-side down, in the pan. Feel free to pack them in pretty tightly. I had about 8 or 9 in my 9x 13 and 4 in my 8x8.
Heavily spoon the enchilada sauce over the enchiladas and then coat with the shredded cheese.
Bake uncovered for about 20 to 25 minutes, until the cheese has melted and the sauce has begun to bubble around the sides.
Phew, please excuse the loooooong delay in blogging over the holidays. My only excuse is that us Spitzers cram nearly every family event into a one month span. Emm's birthday, our anniversary, Christmas and my birthday.
I promise that I will get to my panna cotta recipe but give me a second to do a quick, culinary review of the last two months!
We celebrated and celebrated well over the holidays! Friend trip to San Francisco/ eating everything in sight trip! Below is a picture of my lamb face stew and Sam's kung pao pastrami at Mission Chinese Food in San Francisco. Seriously one of the best meals of my life!
Deep fried turkey with friends on Thanksgiving!
Loveless cafe biscuits and jam while in Nashville!
Pizza party for the cute one's second birthday party!
Fresh chicken for Christmas in Montana [jk, but my father-in-law sent me home with homemade elk pepperoni which barely lasted the long drive home].
And, sorry no pictures, but we celebrated our belated 7th anniversary with yummy French food in Denver and, this weekend, had an awesome birthday dinner at The Kitchen in Denver. Lardo toasties, sauteed greens and lemon, burratta topped bruschetta with roasted radicchio and my fave meal: harissa roasted chicken with cumin yogurt, cucumber and almond, golden raisin and couscous salad!
Anyways, on to the panna cotta!
S'more Topped Dark Chocolate Panna Cotta
*Serves 5
Panna Cotta
2 tbsp of water
2 tsp unflavored gelatin powder
1/2 tsp salt
1 cup of heavy cream
1 cup of whole milk
1 tsp vanilla extract
1/3 cup of sugar
3.5 oz of dark chocolate [I used a yummy big chocolate bar that was a leftover stocking stuffer]
Marshmallow Creme:
1/3 cup of milk
10 marshmallows, cut in half
1/2 tsp vanilla extract
Topping:
A half cup of graham crackers, crushed [cinnamon grahams would be awesome]
Mix the gelatin with the water and set aside for 5 minutes. It will turn into a gelatinous puck, don't worry, it will melt in the hot chocolate. Chop the chocolate into chunks. Place the salt, cream, milk, vanilla, sugar and chocolate chunks into a sauce pan and bring to a boil, stirring frequently. Remove from the heat and stir in the gelatin mixture. Continue to stir for a minute, to fully dissolve the gelatinous puck. Pour the chocolate mixture, through a small sieve, into 5 six ounce bowls, glasses or ramekins. If you have a large bowl [4 cup or higher] with a spout, it might be easier to strain the mixture into the measuring cup and then pour from there. Leave a half inch of room on the top of each container. Let sit in the refrigerator for at least 2 hours before serving.
Before service, place the marshmallows, milk and vanilla extract into a small sauce pan and heat over medium heat until the marshmallows have completely melted.
Top each panna cotta with a tablespoon of marshmallow creme and a couple teaspoons of graham cracker crumbs. Enjoy this luxurious adaptation of a s’more!
This pizza is unbelievable! I was reminded of its glory yesterday when my bestie called to get the ingredients for it. She is a little bit of a weinie with food. Her husband often gets mad at her because when he tries to get her to eat something a little more "exotic" and she refuses, he says, "Ugh, I know that you would eat it if Kristi offered it to you."
This pizza is one of these dishes. It sounds like something that you wouldn't want to eat, then you eat it, you can't stop sighing while eating it and then it becomes your go-to "fancy dinner for friends" meal.
I like to let my dough rise at least a few hours in advance, overnight is even better[I used
my go-to recipe
http://sauceonthewall.blogspot.com/2012/04/tzatziki-and-pitammm-mmmmm.html.
It yields enough for about 3, thin-crust 12 inch pizzas and is probably
a little over a pound of dough], heat up my pizza stone and pound out 2-3 of these pizzas and let my guests, and myself, grab a slice from each pizza as they come out of the oven.
Blue Cheese, Prosciutto, Apricot and Arugula Pizza
*Yields 2, 12 inch pizzas
1 lb. of room temperature pizza dough
6 T of apricot preserves
4 oz. of crumbled blue cheese
Approximately 10 slices of thinly sliced prosciutto [more or less is fine, cooked bacon crumbles would be delicious too], roughly chopped
2 heaping handfuls of baby arugula
Preheat the oven, and pizza stone if using, to 500 degrees.
Divide the dough in two and roll out each section of dough into a rough circle...rustic pizza shapes are just fine!
I have a cool pizza peel, so I assembled my pizzas one at a time on the peel, sprinkling a little bit of cornmeal on the peel before placing the dough on top to aid the pizza sliding off of the peel onto the pizza stone.
Spread half of the apricot preserves on each pizza.
Sprinkle half of the blue cheese crumbles over the thin layer of apricot preserves. Don't worry, the cheese layer will look very scant but it melts into a beautiful "sauce" with the preserves.
Place your pizza on the pizza stone and cook just until the cheese had melted, approximately 4-5 minutes. After the cheese has slightly melted, sprinkle the chopped prosciutto on the pizza and let cook for an additional 3-5 minutes.
Remove the pizza from the oven, sprinkle with a handful of arugula, slice and enjoy while hot!
This year, we decided to spice up our gardening lives a little bit and try our hand at growing brussel sprouts. We bought seedlings, I get nervous to try to grow anything but squash from seed. The brussel sprout plants got giant and held up through multiple frosts. Earlier this week, I decided to harvest my sprouts.
The stalks were as thick and sturdy as branches, so I ended up pulling up the entire plants and hauling them over to my patio table. The leaves at the base of the plant had fallen off but I still had to pluck a ton of large leaves and carefully whittle off each little sprout.
This was the carnage:
And this was the end result, which was only toppled over three times by my toddler:
Then came dinner time! I knew that I was going to use my laboriously gathered brussel sprouts but wasn't sure what would go well with them.
I searched high and low throughout my produce bowl, pantry, fridge and freezer and found some staples: garlic, parmesan cheese and whole wheat noodles. Luckily, I also discovered a couple boneless, skinless chicken thighs in the freezer, a lemon and half a bunch of fresh parsley.
I had everything I needed to make one of my go-to pantry busting pasta dishes. I frequently make a quick lemon and herb pasta with whatever green vegetable I have in the fridge tossed in. Cook whatever pasta you want. Throw in fresh spinach or frozen peas or broccoli [throw the broccoli in with the pasta for the last few minutes]. While the pasta and cooked veggies are draining, I use the same pot and melt a little butter or olive oil. I add in lemon juice, salt, pepper, lots of garlic and fresh parsley. Add the pasta and veggies back with the addition of some parmesan cheese. Toss and eat!
I personally believe that it is a crime to eat unroasted brussel sprouts. The roasting caramelizes and chars them perfectly and gets rid of a lot of their bitterness. I jazzed up one of my fave pasta dishes by roasting my veggies first and adding some marinated and sauteed chicken [the marinade was made with all the flavors that would make my pasta sauce].
Roasted Brussel Sprout and Lemon Chicken Spaghetti
For the chicken and marinade:
2 boneless, skinless chicken thighs
1/2 tsp each of salt, pepper and garlic powder
3 cloves of garlic, chopped
Juice of 1 small lemon
2 T olive oil
1 T chopped fresh parsley
For the roasted brussel sprouts:
3 T olive oil
1 lb of cleaned brussel sprouts
1 t each of salt, pepper and garlic powder
For the pasta:
10 oz or 3/4 pack of whole wheat spaghetti noodles
1 T butter
1 T chopped parsley
3 cloves of garlic, chopped
Juice of 1 small lemon
1/3 cup of grated/ shredded parmesan cheese
Preheat the oven to 425 degrees.
Place the chicken thighs in a small mixing bowl. Top with the marinade ingredients and toss to thoroughly coat the chicken. Cover with Saran Wrap and refrigerate for a half hour before cooking.
While the chicken is marinating, place the brussel sprouts on a baking sheet. Drizzle the olive oil over the sprouts and sprinkle with the salt, pepper and garlic powder. Toss to thoroughly coat each sprout.
Roast the sprouts in the 425 degree oven until slightly browned around the edges, approximately 10 to 15 minutes.
While the sprouts are roasting, bring the pasta water to a boil and cook the spaghetti.
After the chicken has marinated, place the thighs and marinade in a frying pan over medium heat and sautee the chicken, covered, for about 7 minutes a side.
Once the chicken has cooked, remove the chicken thighs from the pan, place in a bowl, cover loosely with aluminum foil and let rest for about 5 minutes before slicing. Leave the juices from the chicken in the pan...this will contribute towards your delicious sauce!
While the chicken is resting, add the butter, additional parsley, garlic and lemon juice to the pan that the chicken cooked in. Warm the mixture slightly over low heat.
Once the chicken has rested, chop it into bite size pieces. Add the chicken, any juice that came out while the chicken was resting, the sauce, brussel sprouts, drained pasta and parmesan cheese to the pot that the pasta cooked in and toss to combine.
A couple of years ago, I realized how easy it was to make sassy adaptations of egg rolls. The secret being....cornstarch. Once you buy egg roll or wonton wrappers, the world is your oyster.
You can stir fry together anything you want and, once it has cooked, toss in a couple tablespoons of corn starch to bind the mixture together. I have sauteed corn, black beans, onions and chilies for Southwestern egg rolls [tossed a little cheese in before stuffing]. I have simply ripped open a bag of cole slaw mix and poured in a little sesame oil and soy sauce while sauteeing.
Once they are stuffed, feel free to experiment with different cooking methods: steaming, baking with an egg wash. I find that you really can't beat a good fry!
Pork and Cabbage Wontons
1 tablespoon of vegetable oil
3/4 pound of ground pork
1/2 of a bag of coleslaw [about 8 oz]
1/2 of an onion, chopped
1 tsp chopped garlic
1 tsp grated ginger
1/4 cup of soy sauce
1 tsp sesame oil
2 T corn starch
1 package of wonton wrappers
Small bowl of water [for wonton sealing purposes]
Oil for pan frying [Depending on the size, of your pan, pour oil in until your reach an oil depth of about a 1/3 of an inch...more is fine too if you are heavy-handed]
Wonton Dipping Sauce
3/4 cup soy sauce
2 tsp brown sugar
1/2 tsp sesame oil
1 finely chopped green onion
1 T toasted sesame seeds
In a frying pan, heat the tablespoon of oil over medium heat. Add the ground pork and cook until slightly brown.
Add the onion, coleslaw, garlic, ginger, soy sauce and sesame oil. Cook, covered, for about 5 minutes or until the onions are translucent and the coleslaw has wilted.
Sprinkle the corn starch over the top of the wonton stuffing and stir for a couple of minutes until the mixture looks glossy and starts to clump together.
Allow the mixture to cool slightly, about 5 minutes. During this time, mix together your dipping sauce ingredients in a bowl and set aside.
Begin assembling your wontons. If you have a fancy way of making and rolling wontons, insert here. I found that the easiest way was to lay a wrapper in the palm of my hand, place about a tablespoon or so of the mixture on one half of the circle, dip my finger in water and trace the rim of the wrapper with my wet finger, then fold the empty half of the wonton over onto the full half so that you have a half-moon and finish by pinching the sides together.
Once you have all your wontons ready to go, begin heating your oil in a frying pan over medium heat. Once you can put a drop of water in the oil and it starts spitting, you are ready to fry.
Being careful not to crowd the pan [wontons can’t be touching each other], place your wontons in the pan. Fry for a couple minutes per side or until each side is golden.
This recipe made a large batch of wontons. We froze about 15 of them before frying so that we wouldn’t go hog wild at dinner!